Blog
How to Import Your Digital Planner into Xodo on Android: A Step-by-Step Guide

Table of Contents
Introduction to Digital Planners & Xodo
In today's fast-paced digital world, staying organized is more important than ever. Digital planners offer a convenient and eco-friendly way to manage your schedule, tasks, and goals. If you're an Android user, the Xodo app is a powerful tool that allows you to seamlessly use digital planners on your device. In this guide, we'll walk you through the process on how to import your digital planner into Xodo, so you can start planning efficiently and effectively.
What Is a Digital Planner and Why Use Xodo?
The Benefits of Digital Planners
Eco-Friendly: Reduce paper waste by going digital.
Customizable: Easily add, remove, or modify pages to suit your needs.
Portable: Access your planner across multiple devices.
Interactive: Utilize hyperlinks for quick navigation.
Why Xodo Is the Perfect Companion for Your Digital Planner
Free and Accessible: Xodo is a free app available on the Google Play Store.
User-Friendly Interface: Intuitive design makes it easy for beginners.
Annotation Tools: Highlight, underline, and add notes effortlessly.
Hyperlink Support: Navigate your planner with clickable links.
Getting Started – Download and Install Xodo
Download Xodo: Visit the Google Play Store and search for “Xodo PDF Reader & Editor.” Download and install the app.
Open Xodo: Launch the app on your Android device.
Grant Permissions: Allow Xodo to access your device's storage to import files.
How to Import Your Digital Planner into Xodo (With Screenshots)


Step 1 – Open Xodo and Tap the “+” Button
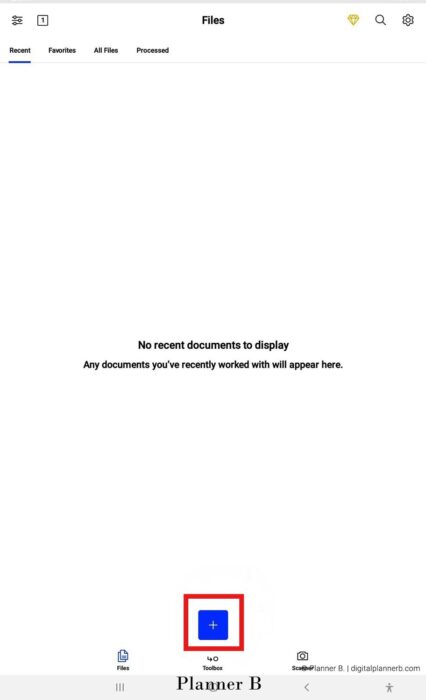
Upon opening Xodo, you'll see your document library. Tap the blue “+” button at the bottom center of the screen to add a new file.
Step 2 – Choose “Open File”
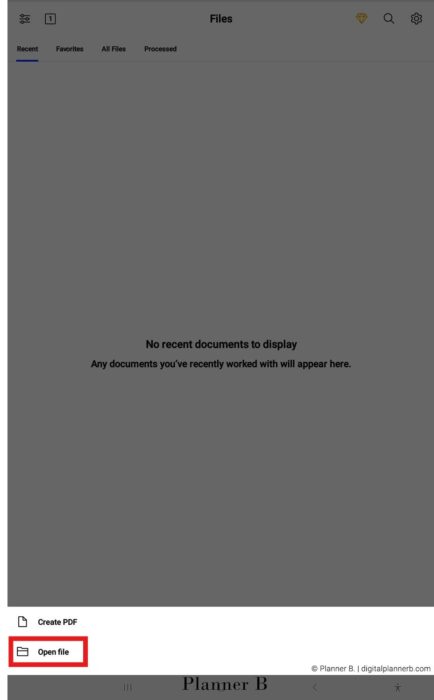
A menu will appear with several options. Select “Open File” to locate your digital planner PDF.
Step 3 – Navigate to “On My Device”
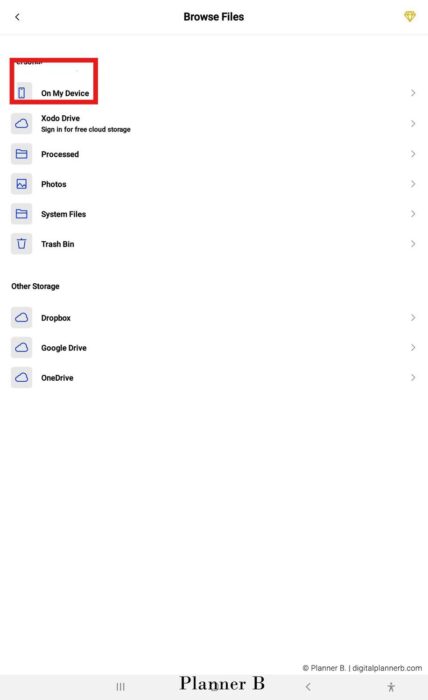
Browse through your device's storage by selecting “On My Device.” Locate the folder where your digital planner PDF is saved.
Step 4 – Tap Your Planner File
Find and tap on your digital planner PDF file. Xodo will open the file, and it will now appear in your document library for easy access.
Set Up for Optimal Planning in Xodo
Step 5 – Switch to “Annotate” Mode
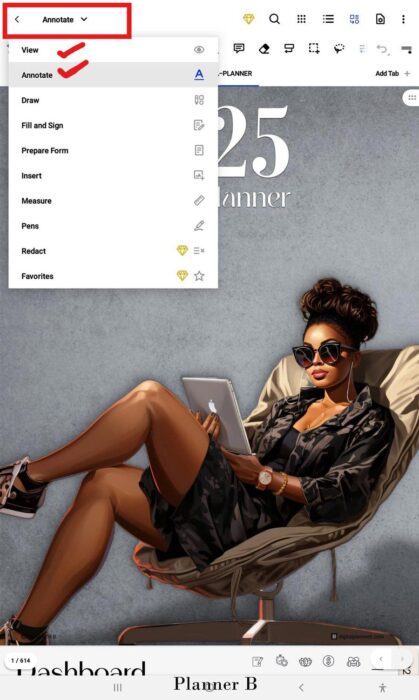
To interact with your planner, tap the pen icon to enter “Annotate” mode. This allows you to add notes, highlight text, and write directly on your planner.
Step 6 – Enable Hyperlink Navigation in “View” Mode
To use hyperlinks within your planner, switch to “View” mode by tapping the hand icon. This enables clickable links for seamless navigation between pages.
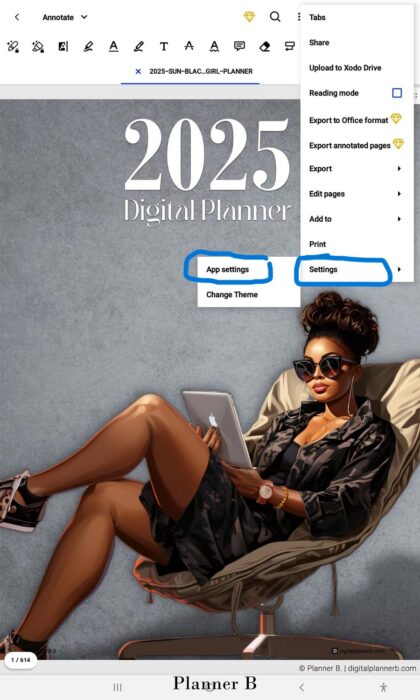
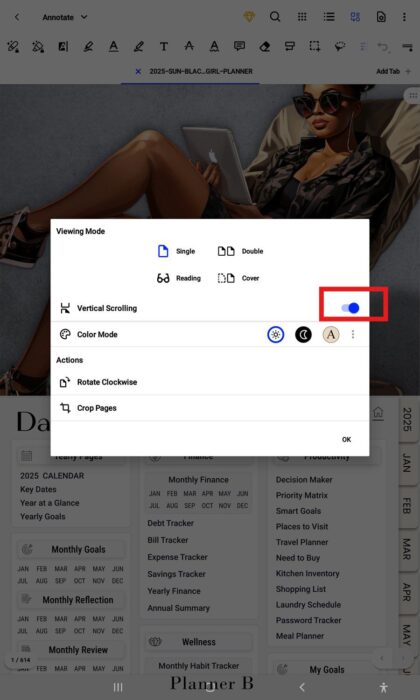
Step 7 – Adjust Viewing Settings
Customize your viewing experience by accessing the settings menu:
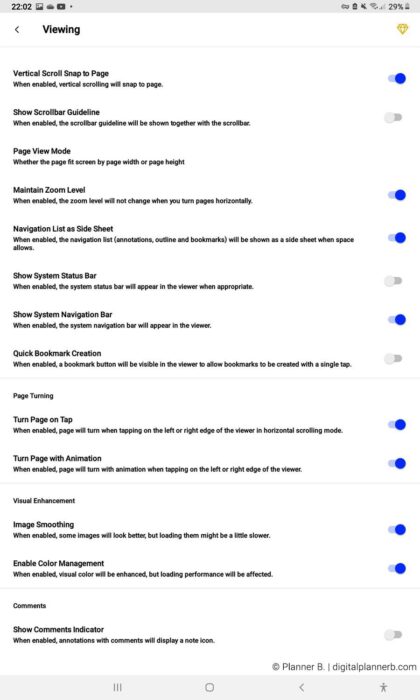
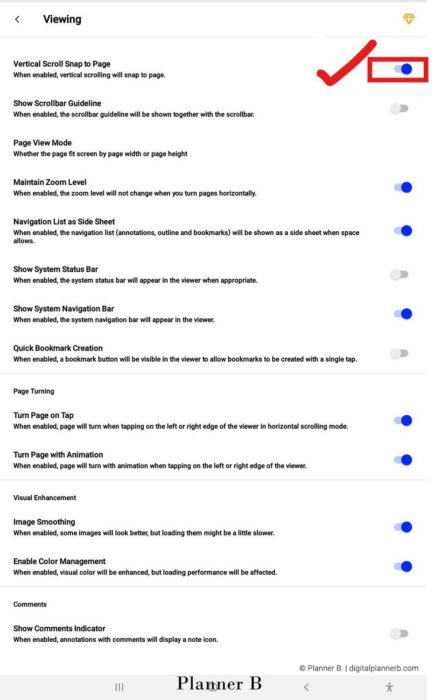
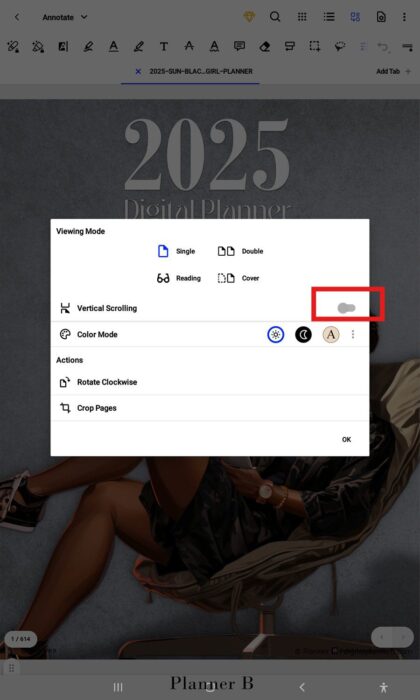
Scroll Direction: Choose between vertical or horizontal scrolling.
Color Modes: Select day or night mode for comfortable viewing.
Zoom Lock: Enable or disable zoom lock based on your preference.
Troubleshooting Common Import Issues
File Not Found: Ensure your digital planner PDF is downloaded and saved on your device.
Permissions Denied: Check your device settings to grant Xodo access to storage.
Hyperlinks Not Working: Make sure you're in “View” mode to activate clickable links.
Tips for Using Your Digital Planner in Xodo
Use Bookmarks and Tabs for Daily Planning
Utilize bookmarks to quickly access frequently used pages, such as daily, weekly, or monthly spreads.
Customize Your View for Less Eye Strain
Adjust brightness and switch to night mode during low-light conditions to reduce eye strain.
Save Annotated Versions Regularly
Regularly save your annotated planner to prevent data loss and ensure your notes are up to date.
Real-User FAQs
Q1: Can I use this digital planner with other apps besides Xodo?
Yes, digital planners in PDF format can also be used with other annotation apps like GoodNotes, Notability, or Samsung Notes, depending on your device.
Q2: How do I delete or replace an old planner in Xodo?
In Xodo, navigate to your document library, tap and hold the planner you wish to delete, and select the delete option. To replace, simply import the new planner following the steps above.
Q3: Is Xodo free to use for digital planners?
Yes, Xodo is a free app with no subscription required, offering a wide range of features suitable for digital planning.
Q4: Do hyperlinks and tabs work in Xodo on all Android tablets?
Hyperlinks and tabs function in Xodo on most Android tablets. Ensure you're in “View” mode to utilize these features effectively.
Q5: What’s the best way to annotate my digital planner on Xodo?
Use the “Annotate” mode to access tools like the pen, highlighter, and text box for effective annotation. Customize the tool settings to match your writing style and preferences.
Conclusion
Importing your digital planner into Xodo on your Android device is a straightforward process that enhances your planning experience. With Xodo's robust features and user-friendly interface, managing your schedule becomes efficient and enjoyable. Explore our collection of high-quality digital planners to find the perfect planner that suits your lifestyle.
Happy planning!